
Mod Featured Items Slideshow Documentation
 |
| 
Installation
Install as usual using the Joomla! installer.
Example Usage
- To create a simple, easily editable slideshow, create a Joomla article and load your images into it. Then select this article as the source for the images in the slideshow options. The slideshow will automatically detect the article images. You will probably also want to turn off the 'link image' option to prevent users clicking through to the source article.
- To create a front page slideshow of images from the latest news articles, select your news categories as the images source, and choose the 'recently modified first' in the ordering options.
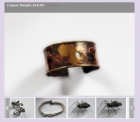
- To display a portfolio of images, create a new Joomla category called 'portfolio'. Create a set of articles belonging to this category, one per image. Upload an image to each article, and add informative text to the article. Then select the category as the source in the module options. If you have the 'link image' option turned on, users will be able to click on the main image in the slideshow to view further information.
- To show selected images from articles from any section of the site, leave the section and category ID parameters blank, and list the article IDs.
- To show images from random articles from a category (section), set the category (section) ID, leave the article IDs blank, and choose the random ordering.
- To show images from the most read articles from a category (section), set the category (section) ID, leave the article IDs blank, and choose the most popular ordering.
- To show images from the most recent articles from a category (section), set the category (section) ID, leave the article IDs blank, and choose the recently modified first ordering.
The module can automatically find articles with images, so there is no need to add any code to the articles themselves.
Module Parameters
You can set the parameters for the module using the Joomla! module manager. The module uses sensible defaults, so to get you started you may only need to pick the articles that you wish to display. The parameters are shown using the links below:-
Images
The slideshow can detect any images embedded using the html <img> tag. Often that is all that you need. However you may want the slideshow to use an image that you don't want to display in the linked article. In this case you can hide an image URL inside an html comment tag using the following format:-
<!--image:images/myimage.jpg-->
Replace 'images/myimage.jpg' with the actual image URL. The module will load any images in these special comment tags before it loads any normal images.
If you are using K2 the slideshow can also detect images loaded in the image field.
Image Options
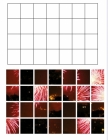
Image Width, Image Height, Thumbnail Size
The main image width and height in pixels, and the thumbnail size.
Use Image W or H
Use image width or height when determining the size of images that don't fit into the image container due to differing proportions. If 'width' is selected, then the main images will be scaled so that their width is the same width as the image container. If 'height' is selected, then the height will be matched to the image container. In each case, any excess of the image will be cut off.
The best thing is to experiment with this setting, and see what is most acceptable for your site.
Use GD For Images
Set this to yes to resize images. Use this if your images are bigger than the size displayed in the slideshow, or if you want to compress images. The original images will not be changed, the resized images will be written to a cache folder within the module.
In subsequent displays of the module the cached images will be used, to improve performance.
Image Quality
Image quality is a value ranging between 0 (worst quality) to 100 (best quality). If your images are good quality to start with then you may be able to reduce the quality down to about 75 without bad effects, and the resulting compression can reduce the file size quite a bit, and will speed loading the slideshow. If your images are already compressed though the results will probably not be good.
-
-

- Translation of "Mail this page"
- In Support Questions / Free Extensions Support Questions
- 9 hours 29 minutes ago
-
-
-
- Feed is showing empty page
- In Support Questions / Virtuemart Extensions Support Questions
- 19 hours 29 minutes ago
-
-
-
- VM 2.6 + Product SnapShot
- In Support Questions / Free Extensions Support Questions
- 19 hours 50 minutes ago
-
-
-

- Articles Count: show one counter for all articles
- In Support Questions / Free Extensions Support Questions
- 5 days 18 hours ago
-
-
-
- Editorial Reviews are not displayed
- In Support Questions / Amazon Support Questions
- 2 weeks 1 day ago
-